Guide:
Decorating cakes
made easy
Some tips and tricks for decorating cakes with chocolate
Text:
Katharina Kuhlmann
Photography:
istock LakuHarilela
EcoFinia GmbH
26 Juli 2018
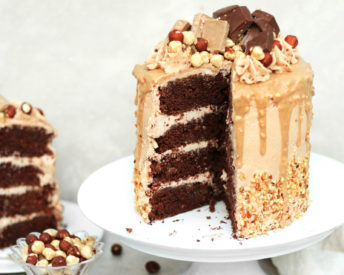
Whether for upcoming parties, celebrations, anniversaries or even a cozy afternoon with the family - a homemade cake always ensures a radiant smile and readied pastry forks. A feast is especially made pretty with decorations, e.g. decorations made of chocolate. If you’ve never dared to decorate a cake before, you should get ready. We present to you the most beautiful and simplest form of cake decorations planned out step by step, to ensure that nothing can go wrong - even for beginners.
Cakes can be decorated in a number of different ways, e.g. marzipan, fondant or cream. But nothing beats delicious chocolate icing or filigree chocolate patterns. On top of that they are also very easy to prepare! So, there’s no need to worry about the nozzle, bain-marie, ganache or core temperature sensors. Cake decorations do not require a magic spell of any sorts. You just need a little practice and patience in order to acquire your desired result.
Assembling the Necessary Equipment
It doesn’t take much. Aside from a core temperature gauge, all the necessary items are usually present in a household. This special thermometer is particularly useful for melting chocolate. Therefore, a purchase is definitely worthwhile. Otherwise, kitchen utensils such as a rolling pin, stainless steel bowl, sharp knife, stirring spoon and baking sheets should be available for the various types of decoration.
Melting Cooking Chocolate - This is how it works
The coarsely chopped cooking chocolate is put into the stainless steel bowl and placed in a pot which (depending on size) is filled with 5 cm of water. The next step is to heat up the stove.
Important: The chocolate coating must never come into contact with the water! Likewise, the stainless steel bowl shouldn’t “lie” in the water and should be heated by the steam.
For a glossy result, the chocolate coating must be heated twice. The first time should be approximately 42 °C, followed by a cooling period at around 27 – 28 °C. The second heating should be between 30 – 33 °C in a bain-marie. In this temperature range the liquid chocolate coating can be ideally handled, e.g. with a piping bag.
Making Your Own Piping Bag
It is not necessary to buy a piping bag, because making it yourself is very easy! First cut a square piece of baking paper in half diagonally to form a triangle. Put a corner on the tip and turn it into a bag. Then fold the upper tip inwards so that the piping bag does not unroll again. Fill the bag with the chocolate coating and cut off only the lower tip.
Caution: Do not cut too much off! The smaller the hole, allows for finer and more delicate patterns to be created.
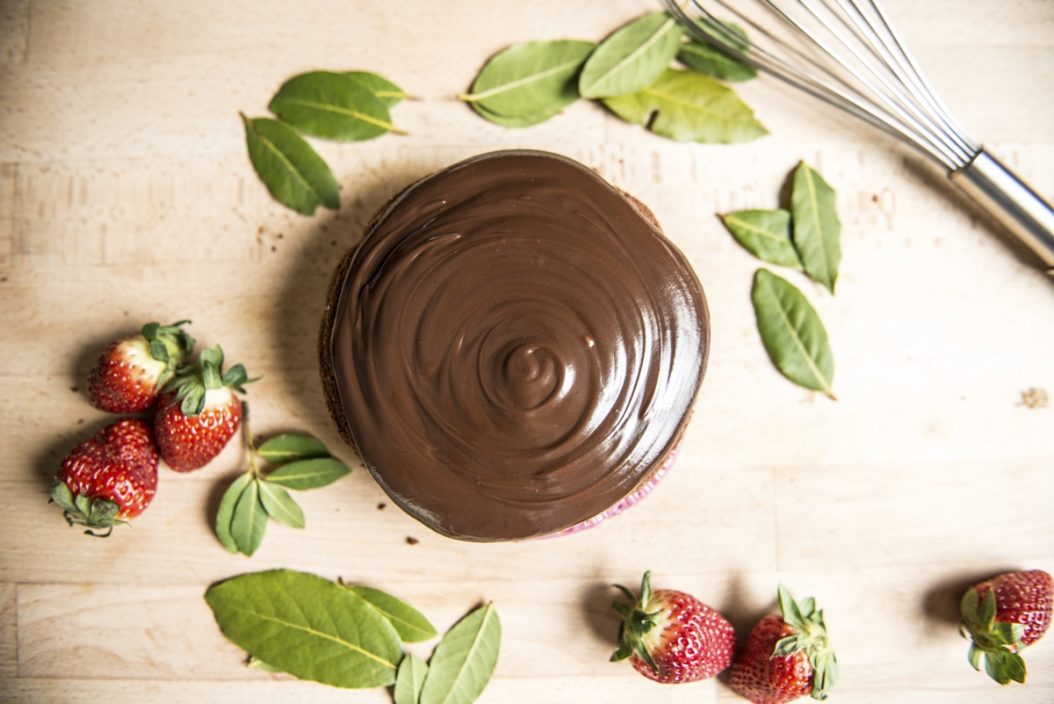
Chocolate Icing: Prepare and Apply a Ganache
A ganache is cooking chocolate with cream, for which the preparation differs little from that of a liquid cooking chocolate. The cream consists of an equal balance of both ingredients, whereas the first cream is heated in a bain-marie. If it foams, add the dark couverture and stir until a smooth mass is obtained. Then use a trowel to distribute the mixture evenly over the cake and catch the remains in a bowl placed under the cooking grid.
Making Patterns and Decorations from Chocolate
With liquid chocolate and a homemade piping bag, all kinds of pretty decorations can be created, e.g. chocolate bars or even detailed lettering. In order to guarantee nothing goes wrong, it is worthwhile to make some test trials. Spread the baking paper on a flat base if necessary. Then sketch the desired shape on the paper with a pencil and then “put it on paper” using the piping bag. After a few minutes the chocolate will become cold and harden and then can be easily removed and placed on the cake as desired.
Tip: If you like chocolate grids, you can make a curved version. Wrap a baking sheet around a rolling pin and apply the chocolate grid to the curvature up to about half on both sides. A few minutes later, the grid can then be easily removed.
The surface of a cake can also be elegantly decorated with chocolate chips and grated chocolate. Simply grate the chocolate or chocolate coating with the desired amount (coarse or fine) with a grater commonly used in households. That gives you a wonderful chocolaty décor. Those who wish to save themselves the work of grating chocolate can fall back on chocolate already grated, such as „Hot Chocolate“ from VIVANI.
It can also be beautifully decorated with cocoa powder. If there is no de-oiled powder close by, and you typically prefer a sweeter taste, you can use instant cocoa powder containing sugar as an alternative. There are no limits to creativity here. Either you dust the whole surface or you make stencils (stars, ornaments, etc.) from thicker paper or cardboard, then place them carefully on the cake surface and sprinkle cocoa powder all around. Important: Carefully remove the stencils so they do not mix together.
Endless Possibilities for Cake Lovers and those with a Sweet Tooth
The presented tips given above only provide a small insight into the infinite possibilities of cake decoration. With these basic tips you can create all kinds of creative chocolate patterns. A mix of two different types (e.g. dark and white chocolate) can also be particularly beautiful. In addition, a mixture of chocolate and honey, which has a similar consistency to plasticine, can be used to form magnificent figurines. So: grab the wooden spoons, cooking chocolate and let your creativity run wild!

Hot Chocolate Drinking Chocolate
62 % Cocoa | pure drinking chocolate | vegan
Related
If you like it, you also like ...
Recipes